Note: The following topic is for Premium Mobile administrators.
The following procedure shows you how to work with annotations to custom procurement messages. For more information, see Configure Messages.
To add an annotation to a custom procurement message, perform the following steps:
1. From the Organize tab in your Tool Bar, click Client Settings.
2. In the Client Settings menu, click the Customized Procurement Messages link.
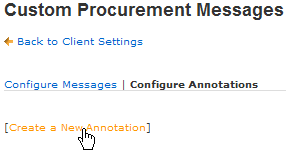
3. In the Custom Procurement Messages screen:
a. Click the Configure Annotations link.
b. Click the Create a New Annotation link.

Alternatively, you may click the Copy link to the right of an existing annotation to begin the process of creating a annotation with similar characteristics.
c. Use the Edit link to specify the items to be labeled with the annotation.
d. Choose the display language from the drop-down-list.
e. Enter the Annotation to be displayed.
f. Click the Save button.
Once your annotation has been created and saved, the Add Annotation in a new language link may be used to add the same annotation in another selectable language.