The features available in Premium Mobile allow you to easily navigate the process of activating a new service.
Note: Some of the features available in Premium Mobile may be restricted by your administrator. This procedure details all of the features to which you may have access.
The following procedure guides you through the process of ordering a new wireless device or service and phone number. An example is given where a new iPhone®, along with a service plan and accessories, is requested. For information about performing these operations in classic view while transferring your personal phone number to your company, see Transfer Service In. For information about transferring your existing personal service from your current carrier to a company carrier using the classic view, see Transfer In and Port.
1. Begin the Activate New Service process in one of the following ways.
· From your Home page, click the View Profile link and in the Services and Assets section of the User Profile page, click the Activate New Service button.
· From the Tool Bar, click Organize and Employees to locate the employee for whom you want to activate a new service. In the Services and Assets section of the User Profile page, click the Activate New Service button.
· In the Get New Wireless Service section (classic view only), click the Activate New Service link.
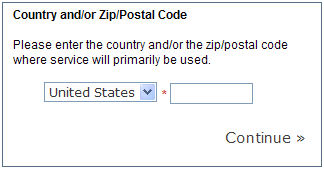
2. In the Country and/or Zip/Postal Code screen:

a. Select the country where your service will be used.
b. Enter the zip/postal code where your service will be used.
c. Click the Continue link to proceed.
3. If your administrator has created a Profiler Configuration, in the Profiler Questions screen (example shown):
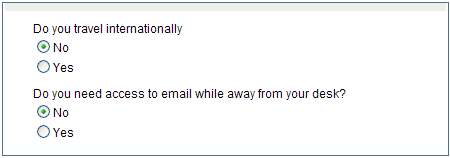
a. Select the radio buttons that answer the questions you have been asked.
This section is locally customized in Client Settings. Your administrator determines the questions you are asked. For more information, contact your administrator.
b. Click the Submit button.
With the Profiler option, the choices with which you are presented in the Order a Cell Phone/Device screen are tailored to your needs.
4. In the Mobile Procurement screen:
a. Select a phone or wireless device.
Your available phones and wireless devices are displayed with pricing that corresponds to your company's carrier contracts.

You may use the Device Category, Carrier, Make, Model, Internal Memory, Color, and Wi-Fi Only to filter your options. If you do not need a new device, you may click the I don't need a device link to go directly to the service plan selection process without adding a new phone or wireless device.
The out of policy ![]() icon indicates devices that are out of policy and may require additional
approval for processing. You may click this icon to view available out
of policy messages.
icon indicates devices that are out of policy and may require additional
approval for processing. You may click this icon to view available out
of policy messages.
When available, you may click the custom
message ![]() icon to display a
message related to the device.
icon to display a
message related to the device.
To view information about a phone or device before you select it, hold your curser over the icon or device and click the Quick Look link to display an information popup.
|
|
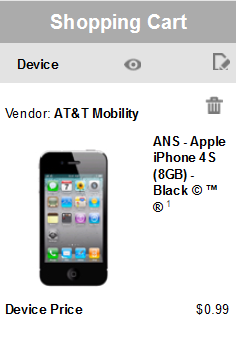
You can select a new phone or wireless device to add to your Shopping Cart in either of the following ways:
Hold your curser over the icon or device and click the Add to Cart link. 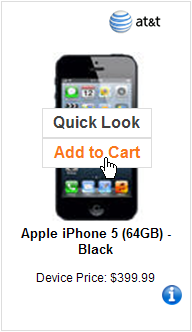 |
Drag-and-drop your selection into the Device section of your Shopping Cart. 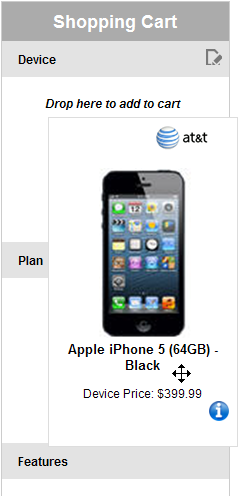 |
 |
The
The
The
The Shopping Cart
will remain available on the left side of your screen throughout
the ordering process. As you progress through the ordering process,
additional information will be added to the Plan,
Features, and Accessories
areas. The |
b. Choose the plan you would like for your phone service.
Your available rate plans are displayed with pricing that corresponds to your company's carrier contracts. You may select a plan for your new phone or wireless device. If you chose to use an existing device, you may update your existing service.
Note: If you are updating an existing service, the system cannot guarantee compatibility between devices and rate plans that were not initially purchased through Premium Mobile. In the event that you select a non-compatible plan, the fulfiller will notify you via e-mail of incompatibility.
An overview of the available plans is presented. To add a Plan to your Shopping Cart and view detailed information, click the plan link.
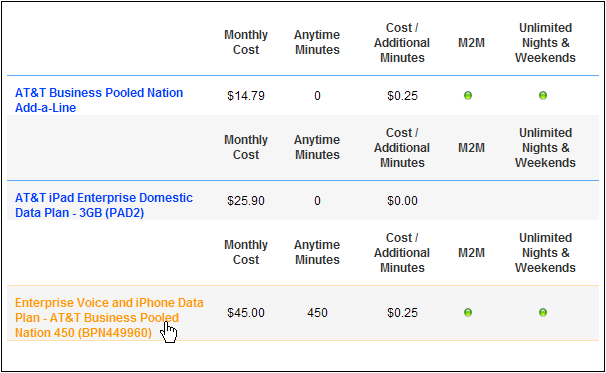
After you review the plan's Included Features, select the checkbox(es) that correspond to the Optional Features you want to add.

Once you have finished adding Optional Features, click the Continue link to proceed.
c. If accessories are available for your cell phone or wireless device, you may use the checkboxes to add one or more accessories.
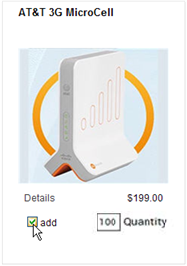
Your available accessories are displayed with pricing that corresponds to your company's carrier contracts.
Once you have finished adding accessories, click the Continue link to proceed.
5. In the Enter Information screen, provide the information requested and click the Continue button to proceed.
Required information fields are denoted with a red asterisk (*).
If your order involves more than one service number, you may use the Bulk Ordering section to specify the Order Quantity of identical devices and associated identical plans, features, and accessories.
Note: For bulk orders, the application displays the total quantity and total price in the shopping cart.

If your order involves shipment you may be prompted to enter a Shipping Address.
Note: The administrator configures the ability to edit the shipping address. To edit the shipping address, contact your administrator.

Enter the Contact Phone Number and Ext that the fulfiller may call for questions or additional information.

In the Additional Instructions and Other fields, enter any notes or comments to guide the fulfiller in completing your request.
Depending on the type of transaction and the payment policies established by your company, you might be prompted to enter a valid credit card and billing address for the portion of the order for which you are liable.
In the Date to Enter Fulfilment field, specify a date for the order to be fulfilled. The order will be fulfilled only on the scheduled date even if the processing is completed earlier.
6. In the Confirm Order screen, verify the information presented and click the Complete button.
Before you click the Complete button, you may use the Shopping Cart features or the Edit Order Details button to return to previous Premium Mobile screens.
After you click the Complete button, the Order Submitted screen displays order and invoice information. Your order is assigned a Vendor Order Number. You may view order information in the User Profile screen of the employee for whom the order was placed. If you are authorized, you may view the information in the Order Status report.