The following procedure guides you through the process of using the Classic View to add or remove features for your existing rate plan and service. For information about performing this same operation using the Wizard View, see Change Features.
Note: Some of the features available in Premium Mobile may be restricted by your administrator.
To change the wireless features on your plan, perform the following steps:
1. In the Classic View Manage Wireless Service screen, click the Update Features link.
If you are authorized, you may use the For Someone Else link to initiate the process for another person. To do so, click the link and use the tools to Search for and Select the person you want to upgrade to a new phone or device and/or change to a different service plan.
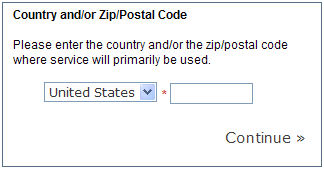
2. In the Country and/or Zip/Postal Code screen:

a. Select the country where your service is used.
b. Enter the zip/postal code where your service is used.
c. Click the Continue link to proceed.
3. In the Mobile Procurement screen:
Your available features are displayed with pricing that corresponds to your company's carrier contracts.
a. Use the radio buttons to select one or more features to Add or Remove.
![]()
Space is provided to enter information about features that are not listed. To assist the fulfiller in accurately completing your request, In the Other field, enter as many details about the feature as you are able.

The![]() change icon may be used to reopen the Mobile Procurement screen so that you can make changes. The
change icon may be used to reopen the Mobile Procurement screen so that you can make changes. The  delete icon allows you to delete the item from your Shopping Cart. The Shopping Cart will remain available on the left side of your screen throughout the ordering process.
b. Click the Continue button to proceed.
4. In the Enter Information screen, provide the information requested and click the Continue button to proceed.
Required information fields are denoted with a red asterisk (*).
In the Additional Instructions and Other fields, enter any notes or comments to guide the fulfiller in completing your request.
Depending on the type of transaction and the payment policies established by your company, you might be prompted to enter a valid credit card and billing address for the portion of the order for which you are liable.
5. In the Confirm Order screen, verify the information presented and click the Complete button.
Before you click the Complete button, you may use the Shopping Cart features or the Edit Order Details button to return to previous Premium Mobile screens.
After you click the Complete button, the Order Submitted screen displays order and invoice information. Your order is assigned a Vendor Order Number. You may view order information in the User Profile screen of the employee for whom the order was placed. If you are authorized, you may view the information in the Order Status report.